Healthy Snack No Bake Granola Bars
Uitgelicht onder: Gezonde Dagrecepten
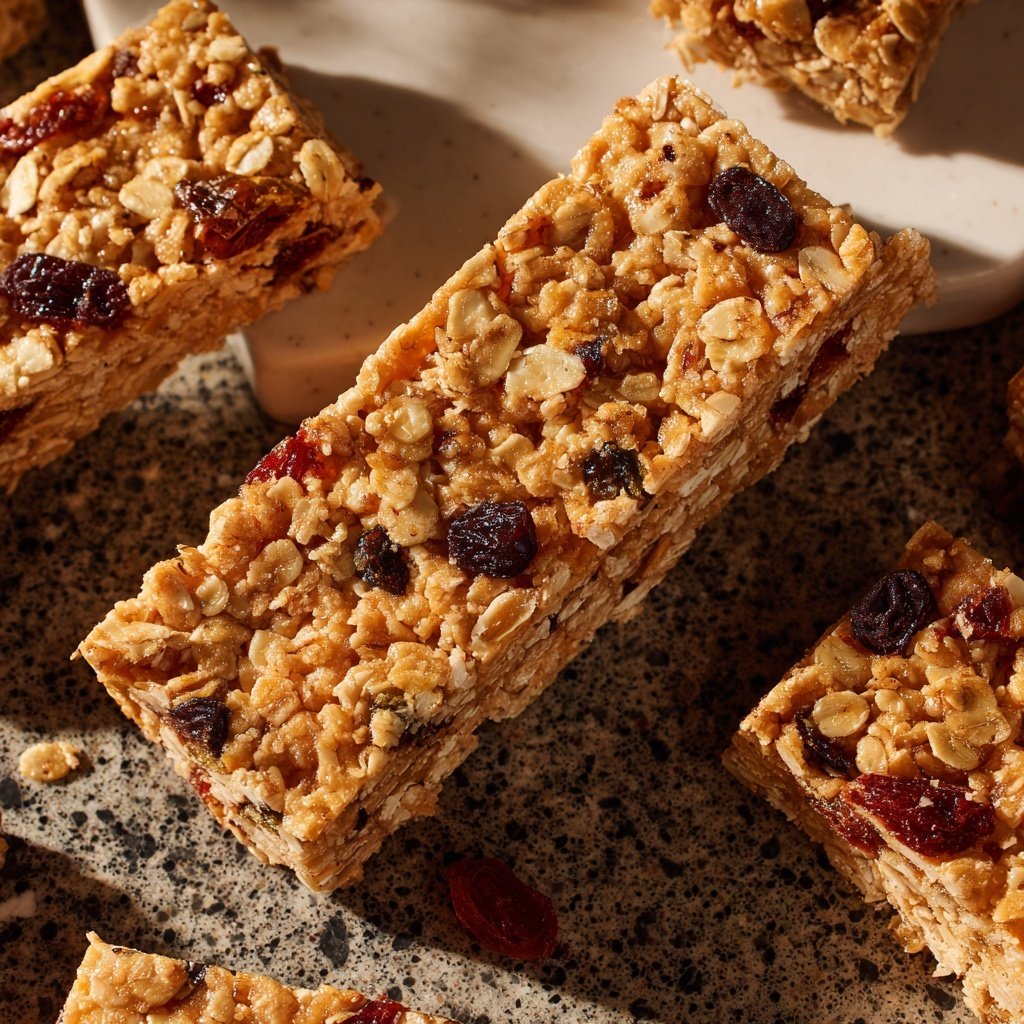
I love making these no-bake granola bars when I’m looking for a quick, healthy snack that’s both satisfying and delicious. With a blend of oats, nuts, and honey, they come together effortlessly without the fuss of baking. These bars are perfect for packing in lunches or enjoying on-the-go. I appreciate how customizable they are; you can throw in your favorite mix-ins to make them your own. Plus, they’re a great way to use up pantry staples while satisfying a sweet tooth without any guilt.
Making these no-bake granola bars was a delightful experiment in the kitchen. I typically rely on store-bought versions, but after realizing how easy and affordable they could be to make at home, I decided to give it a try. I found that the combination of oats, nuts, and a sweetener really gelled together beautifully, creating a chewy yet satisfying texture.
One tip I'd like to share is to let the mixture sit in the fridge for at least an hour before cutting them into bars. This step helps everything solidify so they hold their shape better when you’re ready to enjoy them. Trust me, the wait is worth it!
Why You'll Love This Recipe
- Packed with wholesome ingredients for a guilt-free treat
- Customizable with your favorite nuts and dried fruits
- Perfect for meal prep or quick snacking on the go
Maximizing Flavor and Nutritional Value
The combination of rolled oats and nuts forms the backbone of these granola bars, providing a hearty texture and a wealth of beneficial nutrients. Rolled oats are packed with vitamins, minerals, and fiber, helping to keep you full longer. Nuts like almonds or walnuts contribute healthy fats and protein, making this snack not just delicious, but also a smart choice that can support sustained energy levels throughout your day.
Choosing nut butter is also crucial. Peanut butter adds a rich, creamy taste that pairs beautifully with honey, while almond butter offers a slightly sweeter flavor profile. If you’re looking for a nut-free option, sunflower seed butter can be a great substitute. Keep in mind that the consistency of your nut butter can affect the final texture of the bars; so, if using a natural nut butter, ensure it’s stirred well to combine the oil evenly.
Customizing Your Granola Bars
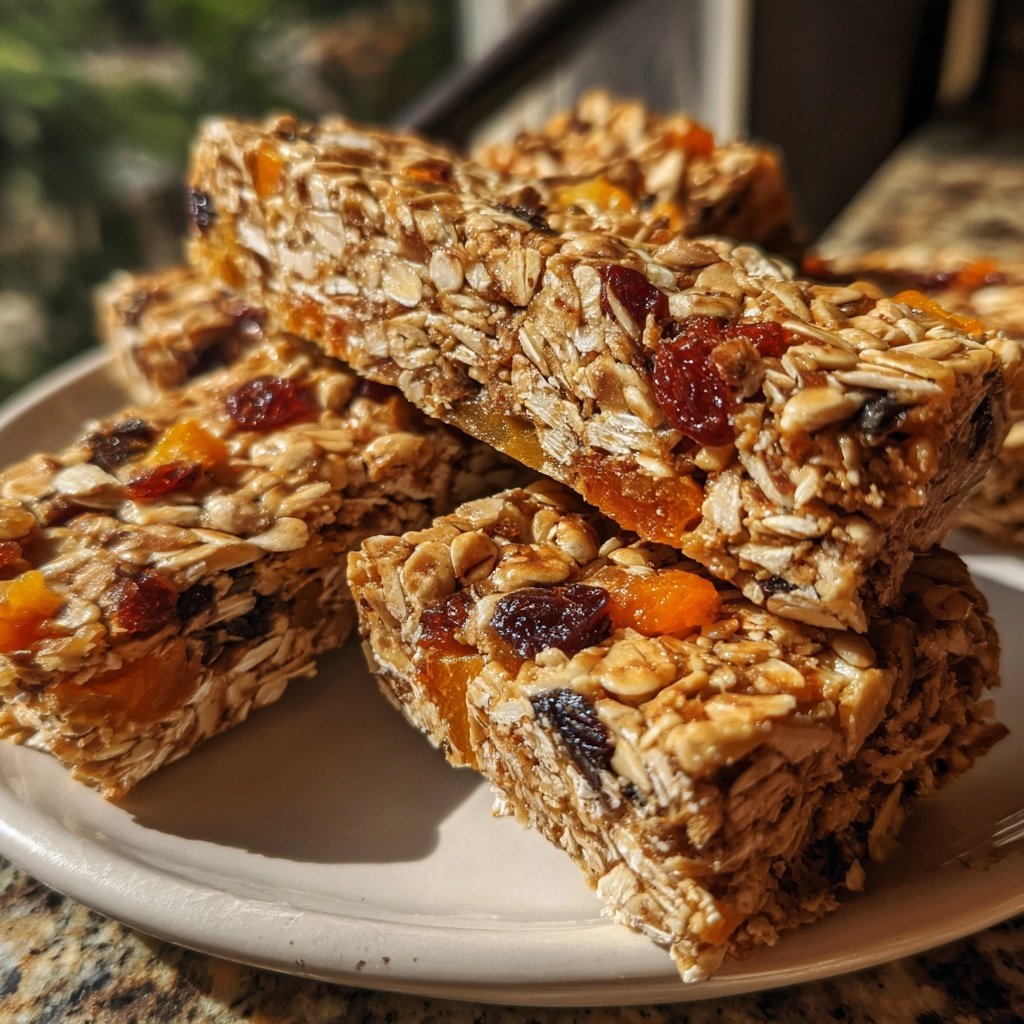
One of my favorite aspects of these granola bars is how easily they can be customized. You can mix in seeds, such as chia or flaxseed, for extra nutrition, or swap in different dried fruits like apricots or figs for a unique twist. Consider using coconut flakes or even crushed pretzels for added texture and flavor that can turn your bars into a delightful treat.
When adding mix-ins, keep in mind the balance of wet and dry ingredients. Too many additions can result in crumbly bars; aim for about 1 cup total of add-ins. If you find your mixture is too dry, a little extra honey or nut butter can help bind it together. Play around with proportions until you find a combination that suits your taste buds.
Storage and Meal Prep Tips
These no-bake granola bars are incredibly versatile for meal prep. Once sliced, store them in an airtight container to maintain freshness. They’ll last about a week at room temperature, but for prolonged storage, keep them in the fridge where they can last up to two weeks. For longer storage, you can freeze the bars; just wrap them individually in parchment paper and then in foil to prevent them from sticking together.
Serving suggestions are endless! Enjoy these bars straight from the fridge, or crumble them over yogurt or smoothie bowls for a nutritious breakfast. They also make an excellent hiking snack or post-workout energy boost. I love to pair them with fresh fruit or a dollop of yogurt for an even more satisfying treat.
Ingredients
Granola Bar Ingredients
- 2 cups rolled oats
- 1 cup nuts (almonds or walnuts), chopped
- 1/2 cup honey or maple syrup
- 1/2 cup peanut butter or almond butter
- 1/4 cup chocolate chips (optional)
- 1/4 cup dried fruit (cranberries or raisins), optional
- 1 tsp vanilla extract
- 1/4 tsp salt
Directions
Prepare the Base
In a large mixing bowl, combine rolled oats, chopped nuts, and salt. Mix thoroughly.
Mix Wet Ingredients
In a small saucepan over low heat, melt the peanut butter and honey together, stirring until smooth. Remove from heat and stir in the vanilla extract.
Combine Mixtures
Pour the melted peanut butter mixture over the dry ingredients. Add chocolate chips and dried fruits if desired. Stir well until everything is evenly coated.
Set the Mixture
Transfer the mixture into a lined 9x9 inch baking dish. Press down firmly to create an even layer. It’s important to pack it tightly.
Chill and Slice
Refrigerate for at least 1 hour or until firm. Once set, remove from the dish and slice into bars.
Professionele Tips
- Store these granola bars in an airtight container in the fridge for up to two weeks. You can also freeze them for longer storage.
Troubleshooting Common Issues
If your bars are falling apart, it’s likely that the binding ingredients weren’t mixed thoroughly or there weren’t enough wet ingredients. Next time, try pressing the mixture more firmly into the baking dish and allowing them to chill longer before slicing. A well-packed base leads to better cohesion and sturdiness under pressure.
On the other hand, if your bars are too sticky, it could be due to the type of nut butter used. Look for a creamier variety for future batches, and remember that adding more rolled oats can help to absorb excessive moisture. Fine-tuning these elements allows for a perfect bar each time.
Scaling the Recipe
Feel free to double or even triple this recipe if you're preparing for a group or looking to stock up for the week. The process remains the same, but consider using a larger baking dish accordingly; a 9x13 inch dish is perfect for doubling the batch. Just ensure to increase the chilling time, allowing the larger volume to set up properly.
If you want to make smaller, snack-sized bars, simply cut them into smaller rectangles or squares before serving. For a fun twist, you can shape them into bite-sized balls instead—an ideal option for little hands or for popping into your mouth during busy days.
Vragen Over Recepten
→ Can I use different types of sweeteners?
Yes! You can substitute honey with maple syrup or agave nectar for a vegan option.
→ How do I make these gluten-free?
Simply ensure that you use gluten-free oats and check that your other ingredients are certified gluten-free.
→ Can I add protein powder to these bars?
Absolutely! Just make sure to adjust the other ingredients slightly to maintain balance in texture.
→ What other mix-ins can I add?
You can add seeds, coconut flakes, or even spices like cinnamon for added flavor.
Healthy Snack No Bake Granola Bars
Gemaakt door: Amelia Roberts
Recepttype: Gezonde Dagrecepten
Vaardigheidsniveau: Easy
Eindportie: 12 bars
Wat je Nodig Hebt
Granola Bar Ingredients
- 2 cups rolled oats
- 1 cup nuts (almonds or walnuts), chopped
- 1/2 cup honey or maple syrup
- 1/2 cup peanut butter or almond butter
- 1/4 cup chocolate chips (optional)
- 1/4 cup dried fruit (cranberries or raisins), optional
- 1 tsp vanilla extract
- 1/4 tsp salt
Stappen
In a large mixing bowl, combine rolled oats, chopped nuts, and salt. Mix thoroughly.
In a small saucepan over low heat, melt the peanut butter and honey together, stirring until smooth. Remove from heat and stir in the vanilla extract.
Pour the melted peanut butter mixture over the dry ingredients. Add chocolate chips and dried fruits if desired. Stir well until everything is evenly coated.
Transfer the mixture into a lined 9x9 inch baking dish. Press down firmly to create an even layer. It’s important to pack it tightly.
Refrigerate for at least 1 hour or until firm. Once set, remove from the dish and slice into bars.
Extra Tips
- Store these granola bars in an airtight container in the fridge for up to two weeks. You can also freeze them for longer storage.
Voedingswaarde (Per Portie)
- Calories: 150 kcal
- Total Fat: 5g
- Saturated Fat: 1g
- Cholesterol: 0mg
- Sodium: 50mg
- Total Carbohydrates: 25g
- Dietary Fiber: 3g
- Sugars: 10g
- Protein: 4g